Upload Wizard: Step 1
The Upload Wizard assists you in adding file upload functionality to your page, including custom settings for images such as the creation of multiple images from one upload.
In order to use this upload wizard, you must first create a file field on the PHP page that is currently active in Dreamweaver. For more instructions on creating this file field, go here.
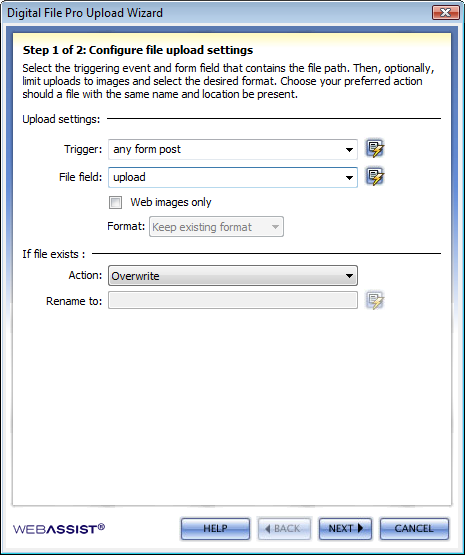
Upload settingsTrigger: select from the list of available triggers on the page. Available triggers include:
File field: select the file field on on your page that specifies the file to be uploaded.
Web images only: If the file upload is intended to be used for image upload functionality, choose this option to enable the image output options in Step 2 of the Upload file wizard. Format: Allows you to specify an image format (GIF, JPEG, or PNG) and quality (JPG and PNG only) that you wish to convert all upload images to. You can also choose to keep the existing format.* *Known issue when using JPEG format - If using the JPEG format with a fixed height and width, while specifying a fill color, you may notice a slight color difference in the resulting image. If file existsAction: select the action to be taken when a file being uploaded is given the same name as an existing file in the upload destination. Options are:
|
 |